
Gym workout plan for beginners
Three full-body sessions a week for someone new to the gym. Each day pairs a squat variation, a press, a row and core work.
A real first week from Astro, FitAstra's AI coach — made by the plan engine the app uses.
Astro
Fuel rule: 1.6-2g protein per kg bodyweight daily — every goal is half training, half kitchen.

Built by Astro on FitAstra · Get the free app: fitastra.co/download
Get fitter · Full gym · Beginner
Your 4-week plan
- sessions / week
- 3
- sessions / week
- exercises / week
- 12
- exercises / week
- working sets, week 1
- 36
- working sets, week 1
Day 1 · Full Body
4 exercisesWarm-up first
- Easy cardio. 5-8 minutes. A brisk walk on the treadmill, an easy bike, or skipping — long enough to break a light sweat and loosen up. You're warming up, not training yet.
- Ramp up: Barbell Squat. Two light sets of Barbell Squat — roughly half your working weight, same reps. These don't count as your sets.
 1
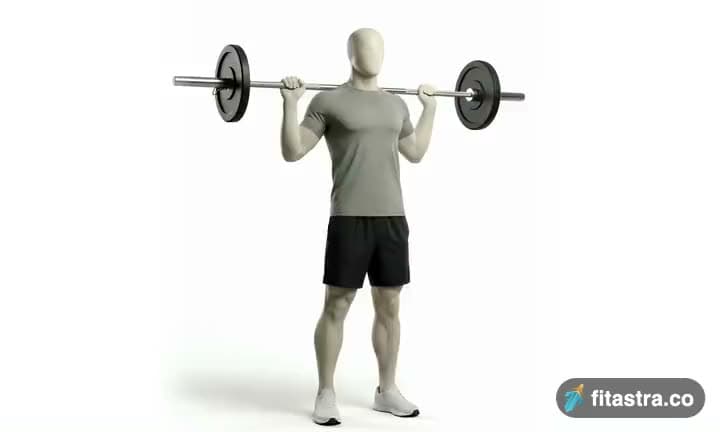
1Barbell Squat
3 × 8–10Rest 90sBrace hard, break at the hips and knees together, knees tracking over the toes.
How to do it
This exercise is best performed inside a squat rack for safety purposes. To begin, first set the bar on a rack to just below shoulder level. Once the correct height is chosen and the bar is loaded, step under the bar and place the back of your shoulders (slightly below the neck) across it. Hold on to the bar using both arms at each side and lift it off the rack by first pushing with your legs and at the same time straightening your torso. Step away from the rack and position your legs using a shoulder width medium stance with the toes slightly pointed out. Keep your head up at all times and also maintain a straight back. This will be your starting position. (Note: For the purposes of this discussion we will use the medium stance described above which targets overall development; however you can choose any of the three stances discussed in the foot stances section). Begin to slowly lower the bar by bending the knees and hips as you maintain a straight posture with the head up. Continue down until the angle between the upper leg and the calves becomes slightly less than 90-degrees. Inhale as you perform this portion of the movement. Tip: If you performed the exercise correctly, the front of the knees should make an imaginary straight line with the toes that is perpendicular to the front. If your knees are past that imaginary line (if they are past your toes) then you are placing undue stress on the knee and the exercise has been performed incorrectly. Begin to raise the bar as you exhale by pushing the floor with the heel of your foot as you straighten the legs again and go back to the starting position. Repeat for the recommended amount of repetitions.
 2
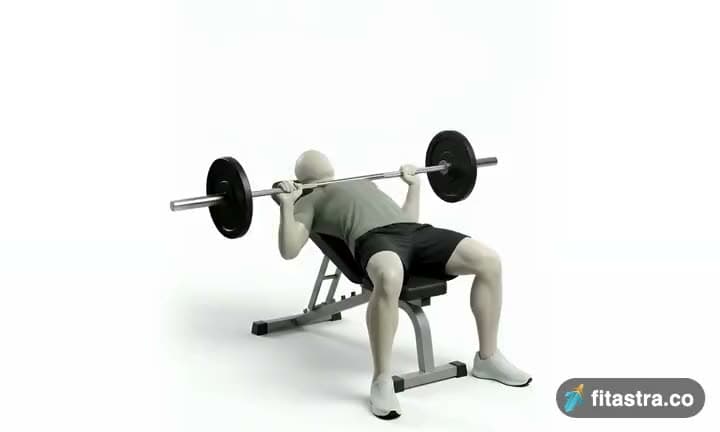
2Barbell Incline Bench Press - Medium Grip
3 × 8–10Rest 90sTouch the upper chest and keep your shoulder blades pinned back into the bench.
How to do it
Lie back on an incline bench. Using a medium-width grip (a grip that creates a 90-degree angle in the middle of the movement between the forearms and the upper arms), lift the bar from the rack and hold it straight over you with your arms locked. This will be your starting position. As you breathe in, come down slowly until you feel the bar on you upper chest. After a second pause, bring the bar back to the starting position as you breathe out and push the bar using your chest muscles. Lock your arms in the contracted position, squeeze your chest, hold for a second and then start coming down slowly again. Tip: it should take at least twice as long to go down than to come up. Repeat the movement for the prescribed amount of repetitions. When you are done, place the bar back in the rack.
 3
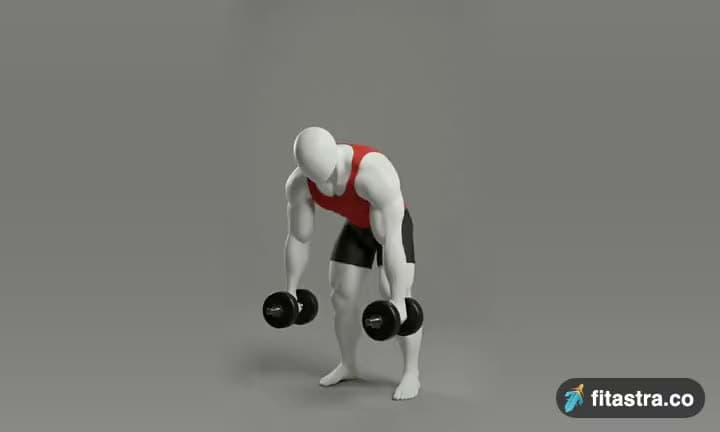
3Bent Over Two-Dumbbell Row
3 × 10–12Rest 60sPull to the belly, squeeze the shoulder blades, keep the torso still.
How to do it
With a dumbbell in each hand (palms facing your torso), bend your knees slightly and bring your torso forward by bending at the waist; as you bend make sure to keep your back straight until it is almost parallel to the floor. Tip: Make sure that you keep the head up. The weights should hang directly in front of you as your arms hang perpendicular to the floor and your torso. This is your starting position. While keeping the torso stationary, lift the dumbbells to your side (as you breathe out), keeping the elbows close to the body (do not exert any force with the forearm other than holding the weights). On the top contracted position, squeeze the back muscles and hold for a second. Slowly lower the weight again to the starting position as you inhale. Repeat for the recommended amount of repetitions.
 4
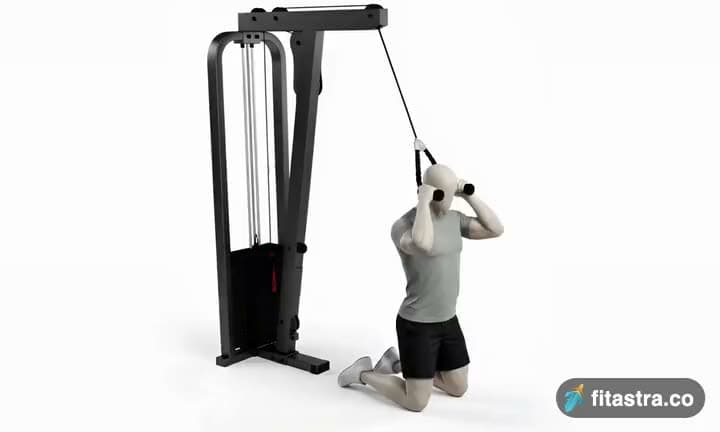
4Cable Crunch
3 × 12–15Rest 60sCurl the ribs toward the hips. Don't pull on your neck.
How to do it
Kneel below a high pulley that contains a rope attachment. Grasp cable rope attachment and lower the rope until your hands are placed next to your face. Flex your hips slightly and allow the weight to hyperextend the lower back. This will be your starting position. With the hips stationary, flex the waist as you contract the abs so that the elbows travel towards the middle of the thighs. Exhale as you perform this portion of the movement and hold the contraction for a second. Slowly return to the starting position as you inhale. Tip: Make sure that you keep constant tension on the abs throughout the movement. Also, do not choose a weight so heavy that the lower back handles the brunt of the work. Repeat for the recommended amount of repetitions.
Day 3 · Full Body
4 exercisesWarm-up first
- Easy cardio. 5-8 minutes. A brisk walk on the treadmill, an easy bike, or skipping — long enough to break a light sweat and loosen up. You're warming up, not training yet.
- Ramp up: Leg Press. Two light sets of Leg Press — roughly half your working weight, same reps. These don't count as your sets.
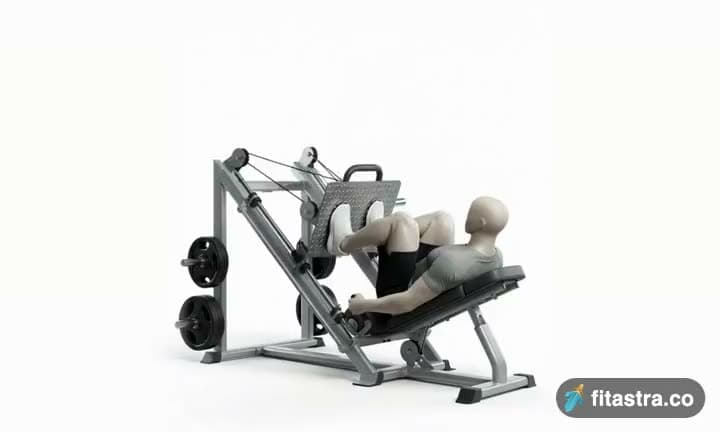 1
1Leg Press
3 × 8–10Rest 90sBrace hard, break at the hips and knees together, knees tracking over the toes.
How to do it
Using a leg press machine, sit down on the machine and place your legs on the platform directly in front of you at a medium (shoulder width) foot stance. (Note: For the purposes of this discussion we will use the medium stance described above which targets overall development; however you can choose any of the three stances described in the foot positioning section). Lower the safety bars holding the weighted platform in place and press the platform all the way up until your legs are fully extended in front of you. Tip: Make sure that you do not lock your knees. Your torso and the legs should make a perfect 90-degree angle. This will be your starting position. As you inhale, slowly lower the platform until your upper and lower legs make a 90-degree angle. Pushing mainly with the heels of your feet and using the quadriceps go back to the starting position as you exhale. Repeat for the recommended amount of repetitions and ensure to lock the safety pins properly once you are done. You do not want that platform falling on you fully loaded.
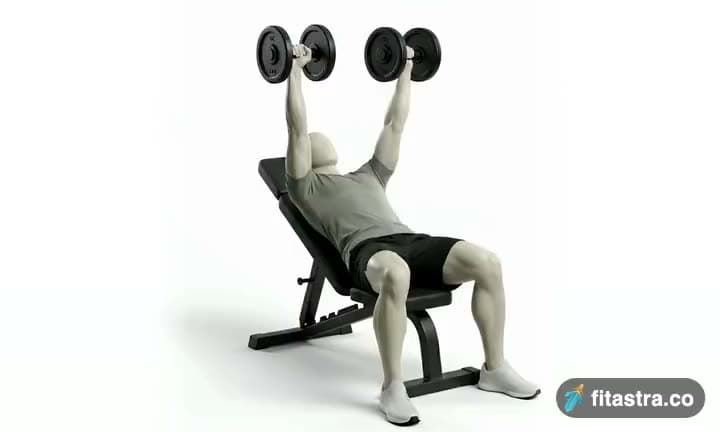 2
2Incline Dumbbell Press
3 × 8–10Rest 90sTouch the upper chest and keep your shoulder blades pinned back into the bench.
How to do it
Lie back on an incline bench with a dumbbell in each hand atop your thighs. The palms of your hands will be facing each other. Then, using your thighs to help push the dumbbells up, lift the dumbbells one at a time so that you can hold them at shoulder width. Once you have the dumbbells raised to shoulder width, rotate your wrists forward so that the palms of your hands are facing away from you. This will be your starting position. Be sure to keep full control of the dumbbells at all times. Then breathe out and push the dumbbells up with your chest. Lock your arms at the top, hold for a second, and then start slowly lowering the weight. Tip Ideally, lowering the weights should take about twice as long as raising them. Repeat the movement for the prescribed amount of repetitions. When you are done, place the dumbbells back on your thighs and then on the floor. This is the safest manner to release the dumbbells.
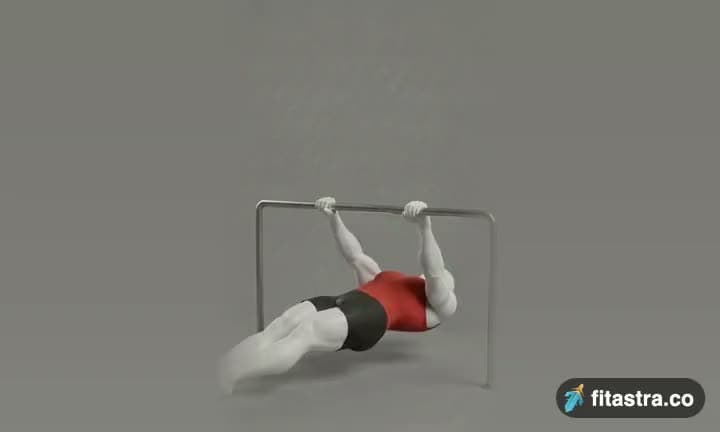 3
3Inverted Row
3 × 10–12Rest 60sPull to the belly, squeeze the shoulder blades, keep the torso still.
How to do it
Position a bar in a rack to about waist height. You can also use a smith machine. Take a wider than shoulder width grip on the bar and position yourself hanging underneath the bar. Your body should be straight with your heels on the ground with your arms fully extended. This will be your starting position. Begin by flexing the elbow, pulling your chest towards the bar. Retract your shoulder blades as you perform the movement. Pause at the top of the motion, and return yourself to the start position. Repeat for the desired number of repetitions.
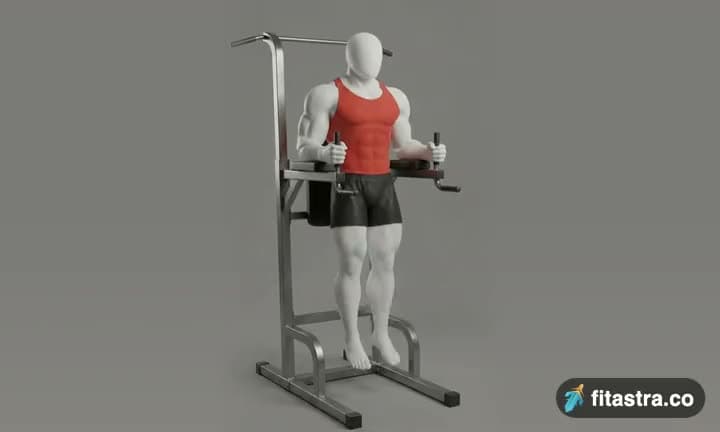 4
4Knee/Hip Raise On Parallel Bars
3 × 12–15Rest 60sCurl the ribs toward the hips. Don't pull on your neck.
How to do it
Position your body on the vertical leg raise bench so that your forearms are resting on the pads next to the torso and holding on to the handles. Your arms will be bent at a 90 degree angle. The torso should be straight with the lower back pressed against the pad of the machine and the legs extended pointing towards the floor. This will be your starting position. Now as you breathe out, lift your legs up as you keep them extended. Continue this movement until your legs are roughly parallel to the floor and then hold the contraction for a second. Tip: Do not use any momentum or swinging as you perform this exercise. Slowly go back to the starting position as you breathe in. Repeat for the recommended amount of repetitions.
Day 5 · Full Body
4 exercisesWarm-up first
- Easy cardio. 5-8 minutes. A brisk walk on the treadmill, an easy bike, or skipping — long enough to break a light sweat and loosen up. You're warming up, not training yet.
- Ramp up: Hack Squat. Two light sets of Hack Squat — roughly half your working weight, same reps. These don't count as your sets.
 1
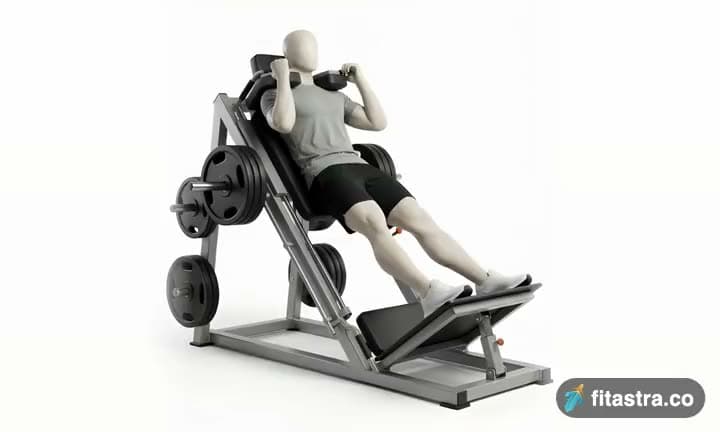
1Hack Squat
3 × 8–10Rest 90sBrace hard, break at the hips and knees together, knees tracking over the toes.
How to do it
Place the back of your torso against the back pad of the machine and hook your shoulders under the shoulder pads provided. Position your legs in the platform using a shoulder width medium stance with the toes slightly pointed out. Tip: Keep your head up at all times and also maintain the back on the pad at all times. Place your arms on the side handles of the machine and disengage the safety bars (which on most designs is done by moving the side handles from a facing front position to a diagonal position). Now straighten your legs without locking the knees. This will be your starting position. (Note: For the purposes of this discussion we will use the medium stance described above which targets overall development; however you can choose any of the three stances described in the foot positioning section). Begin to slowly lower the unit by bending the knees as you maintain a straight posture with the head up (back on the pad at all times). Continue down until the angle between the upper leg and the calves becomes slightly less than 90-degrees (which is the point in which the upper legs are below parallel to the floor). Inhale as you perform this portion of the movement. Tip: If you performed the exercise correctly, the front of the knees should make an imaginary straight line with the toes that is perpendicular to the front. If your knees are past that imaginary line (if they are past your toes) then you are placing undue stress on the knee and the exercise has been performed incorrectly. Begin to raise the unit as you exhale by pushing the floor with mainly with the heel of your foot as you straighten the legs again and go back to the starting position. Repeat for the recommended amount of repetitions.
 2
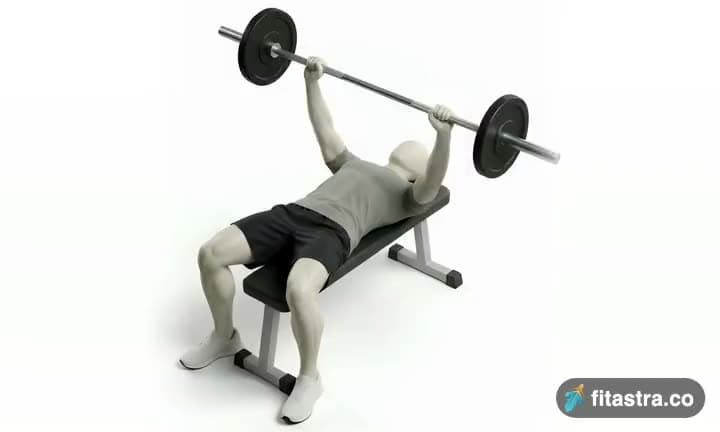
2Barbell Bench Press - Medium Grip
3 × 8–10Rest 90sElbows tucked to about 45 degrees, touch the chest, then drive the floor away.
How to do it
Lie back on a flat bench. Using a medium width grip (a grip that creates a 90-degree angle in the middle of the movement between the forearms and the upper arms), lift the bar from the rack and hold it straight over you with your arms locked. This will be your starting position. From the starting position, breathe in and begin coming down slowly until the bar touches your middle chest. After a brief pause, push the bar back to the starting position as you breathe out. Focus on pushing the bar using your chest muscles. Lock your arms and squeeze your chest in the contracted position at the top of the motion, hold for a second and then start coming down slowly again. Tip: Ideally, lowering the weight should take about twice as long as raising it. Repeat the movement for the prescribed amount of repetitions. When you are done, place the bar back in the rack.
 3
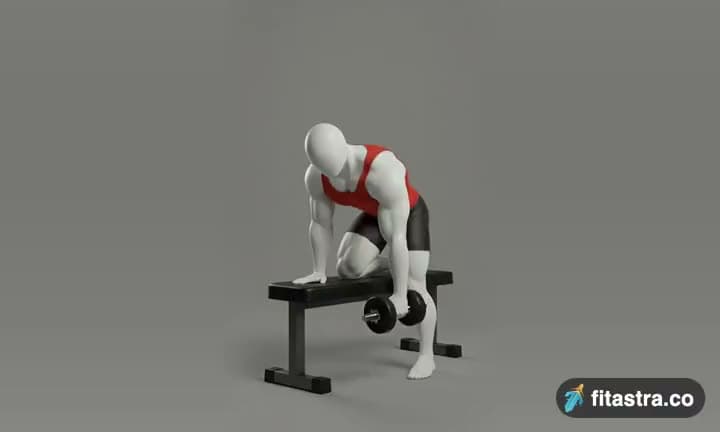
3One-Arm Dumbbell Row
3 × 10–12Rest 60sPull to the belly, squeeze the shoulder blades, keep the torso still.
How to do it
Choose a flat bench and place a dumbbell on each side of it. Place the right leg on top of the end of the bench, bend your torso forward from the waist until your upper body is parallel to the floor, and place your right hand on the other end of the bench for support. Use the left hand to pick up the dumbbell on the floor and hold the weight while keeping your lower back straight. The palm of the hand should be facing your torso. This will be your starting position. Pull the resistance straight up to the side of your chest, keeping your upper arm close to your side and keeping the torso stationary. Breathe out as you perform this step. Tip: Concentrate on squeezing the back muscles once you reach the full contracted position. Also, make sure that the force is performed with the back muscles and not the arms. Finally, the upper torso should remain stationary and only the arms should move. The forearms should do no other work except for holding the dumbbell; therefore do not try to pull the dumbbell up using the forearms. Lower the resistance straight down to the starting position. Breathe in as you perform this step. Repeat the movement for the specified amount of repetitions. Switch sides and repeat again with the other arm.
 4
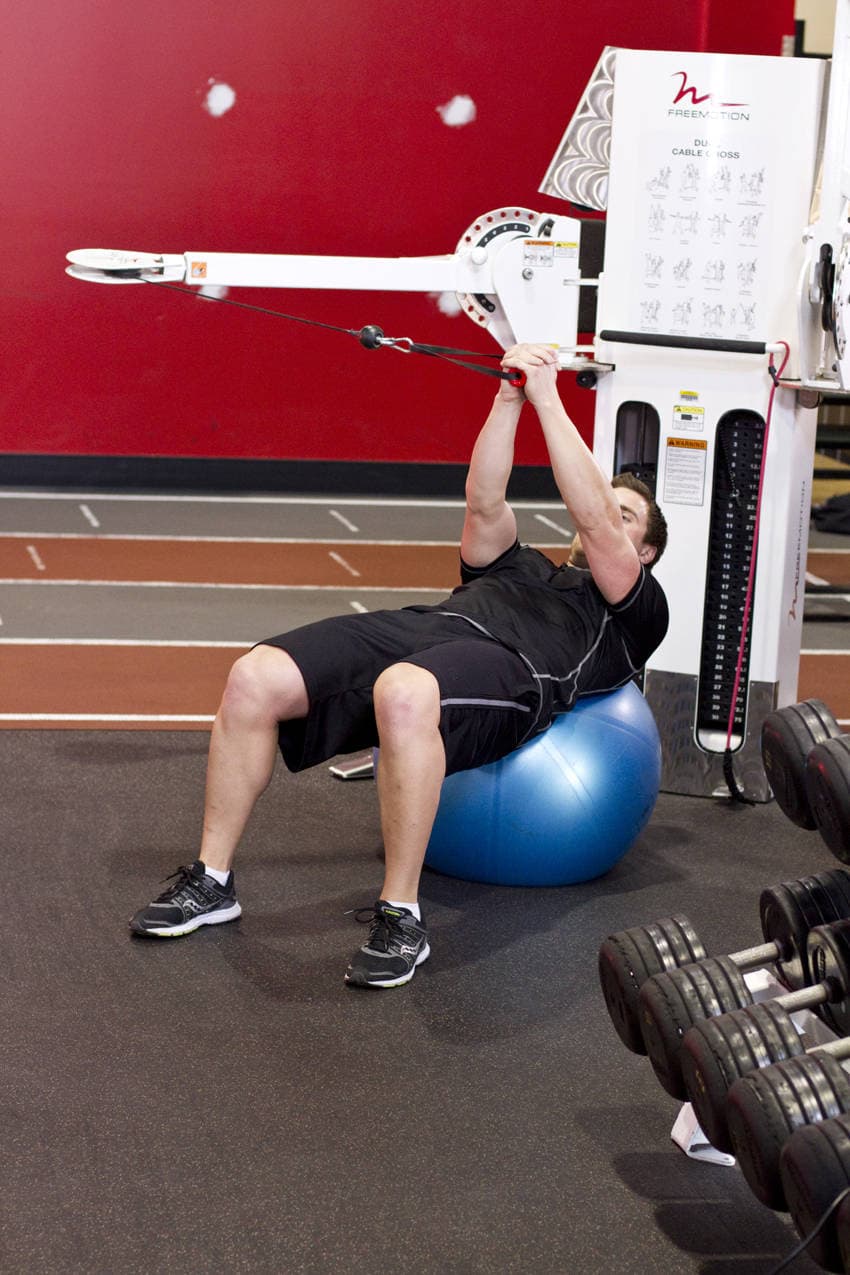
4Cable Russian Twists
3 × 12–15 per sideRest 60sTurn from the ribs, not the arms — hips stay square.
How to do it
Connect a standard handle attachment, and position the cable to a middle pulley position. Lie on a stability ball perpendicular to the cable and grab the handle with one hand. You should be approximately arm's length away from the pulley, with the tension of the weight on the cable. Grab the handle with both hands and fully extend your arms above your chest. You hands should be directly in-line with the pulley. If not, adjust the pulley up or down until they are. Keep your hips elevated and abs engaged. Rotate your torso away from the pulley for a full-quarter rotation. Your body should be flat from head to knees. Pause for a moment and in a slow and controlled manner reset to the starting position. You should still have side tension on the cable in the resting position. Repeat the same movement to failure. Then, reposition and repeat the same series of movements on the opposite side.
Astro
In the app I build this from everything you tell me — injuries, moves you hate, your deadline — then check in every morning with an insight from your own training. Free.

How the 4 weeks progress
- Week 1 · Foundation. Learn the movements, leave reps in the tank. Form is the flex.
- Weeks 2–3 · Build. Add a set — same form, more work. This is where it happens.
- Week 4 · Deload. One set less, lighter on purpose. Recovery is training too.

Keep going with Astro — the FitAstra app is free
- • Built from all your answers (Free)
- • A morning insight and a recap after every workout (Free)
- • Your plan adapts when your week does (Pro)
Scan, or open fitastra.co/download
Week one is the start.
What Astro does in the app, after this page.
- Free
Built from all your answers
The app asks about injuries, exercises you dislike and your deadline before Astro builds your plan.
- Free
A morning insight and a recap after every workout
Drawn from your own training history — if your data does not show it, Astro does not claim it.
- Pro
Your plan adapts when your week does
Miss a week and Astro rebuilds it around the reason, scales a hard week down, or regenerates a day.

Your fitness community
is waiting.
Find partners, book coaches, and train with Astro — free to start, right from your phone. Partners and events stay free; Astro's chat and plan changes are FitAstra Pro.


Free to download · No credit card required